Throughout Spring 2013 - Fall 2014, I have taken part in building three games using the ImpactJS Game Engine within the City College of New York (CCNY) Game development club. This tutorial serves as a guide for building a simple platformer game using ImpactJS and is intended for all audiences.
What we will cover
This tutorial will cover the following topics:
- Why use ImpactJS?
- Project Structure
- Understanding ImpactJS game loop
- Game logic implementation
- Player / enemy implementation
- Creating a simple powerup
- Creating levels
Throughout the lifetime of this tutorial, it will be updated with new features.
Why ImpactJS?
At the start of the Game Development club in Spring 2013, our group was experimenting with several game engines at the time. After spending a few weeks trying out various frameworks and building simple games, we realized how much functionality would have to be built just to create a simple, complete game. These features revolved around player physics, camera options, enemies/artificial intelligence, level transitioning, level building and collision. At that time, building our own game framework was not an option - which is when we stumbled upon ImpactJS.
ImpactJS provides all of the features noted above and more, exposing easy methods for creating entities (players, enemies), level transitioning, camera functionalities and collision. To top it all off, ImpactJS comes with its own Tile Editor - Weltmeister. Weltmeister provides an easy to use interface for loading level assets, adding/removing layers, setting up collisions, and exporting the level for use within ImpactJS itself. At the moment, ImpactJS costs a hefty $99, but if you can get over the cost then you’ve got your hands on a very powerful game engine.
Skills / Pre-requisites
To get the most of this tutorial, you should have some understanding of the following:
- Basic knowledge of JavaScript (Types, pointers, scope)
- Basic usage of your terminal (Navigating directories, creating folders and files)
- Github account (for cloning the completed project repository)
To learn some basic JavaScript and get some hands-on experience, I recommend CodeAcademy’s JavaScript course. CodeAcademy is free to use and provides an excellent set of interactive programming examples for not only JavaScript, but Python, PHP, Ruby, and more. They even offer courses to teach you how to build web sites, use external web APIs, and so much more. If you are interested in web technologies in general, it is a good place to get started.
Having a Github account is not mandatory, as you can download repositories as a zip file. However, I highly encourage you to create an account if you do not have one already - Version Control Systems such as git and mercurial (hg) are the defacto standard when working on software at any company. By getting started with learning git (the command line program used for interacting with Github) and becoming familar with Github (A website for storing repositories containing source code), you will be gaining highly valuable knowledge, as well as the ability to read other people’s source code and contribute to open source projects.
Git interactive tutorial Guide to Git/Github
Knowledge of using your terminal is not required(as you can create files manually), but it is recommended to learn. Throughout this tutorial, I will often use bash commands native to UNIX systems (Mac OS X, Linux). I have provided some useful resources for learning below.
Unix Tutorial Home Unix Tutorial Part 1 Unix Tutorial Part 2
I also recommend you find a good text editor and get used to it. My personal favorites are Vim and Sublime Text.
Debugging
In order to properly debug JavaScript, we need the right tools. Luckily, Chrome provides Developer Tools for interacting with the DOM and for debugging JavaScript code. For Firefox users, there is an extension called Firebug which provides the same functionality. I recommend you become familiar with either of these tools, as they are essential for debugging any JavaScript code you will write in the future. See the links below for downloads and tutorials.
Firebug download Firebug tutorial Developer tools tutorial
Project Structure
At the end of this tutorial, your project structure should look like the following:
├── index.html                  # Serves game files. Included with ImpactJS
├── lib
│   ├── game
│   │   ├── entities            # Place all game entities in here
│   │   │   ├── goomba.js
│   │   │   ├── mushroom.js
│   │   │   └── player.js
│   │   ├── levels              # Place all game levels in here
│   │   │   └── basic.js
│   │   └── main.js
│   ├── impact                  # ImpactJS source code, included with ImpactJS
│   │   ├── animation.js
│   │   ├── background-map.js
│   │   ├── collision-map.js
│   │   ├── debug
│   │   │   ├── debug.css
│   │   │   ├── debug.js
│   │   │   ├── entities-panel.js
│   │   │   ├── graph-panel.js
│   │   │   ├── maps-panel.js
│   │   │   └── menu.js
│   │   ├── entity.js
│   │   ├── font.js
│   │   ├── game.js
│   │   ├── image.js
│   │   ├── impact.js
│   │   ├── input.js
│   │   ├── loader.js
│   │   ├── map.js
│   │   ├── sound.js
│   │   ├── system.js
│   │   └── timer.js
│   └── weltmeister             # Weltmeister source code, included with ImpactJS
│       ├── api
│       │   ├── browse.php
│       │   ├── config.php
│       │   ├── glob.php
│       │   └── save.php
│       ├── arrow.png
│       ├── collisiontiles-64.png
│       ├── config.js
│       ├── edit-entities.js
│       ├── edit-map.js
│       ├── entities.js
│       ├── evented-input.js
│       ├── jquery-1.7.1.min.js
│       ├── jquery-ui-1.8.1.custom.min.js
│       ├── modal-dialogs.js
│       ├── select-file-dropdown.js
│       ├── tile-select.js
│       ├── undo.js
│       ├── weltmeister.css
│       └── weltmeister.js
├── media                       # Place all game media here
│   ├── 04b03.font.png
│   ├── bg
│   │   └── star.png
│   ├── enemies
│   │   └── goomba.png
│   ├── fg
│   │   └── forest.png
│   ├── mushroom.png
│   └── player.png
├── server.py                   # Python web server for ImpactJS. Download separately.
└── weltmeister.html            # Weltmeister page, included with ImpactJS.
Please note that the following files are provided for you upon downloading ImpactJS: weltmeister.html, index.html, impact folder, weltmeister folder.
Download completed tutorial source code
Directory setup
First, we create a root folder for our project and other necessary folders.
$ mkdir tutorial
$ cd tutorial
~/tutorial $ mkdir lib
~/tutorial $ mkdir media
~/tutorial $ mkdir lib/game
~/tutorial $ mkdir lib/game/entities
~/tutorial $ mkdir lib/game/levels
Within the root folder tutorial, place weltmeister.html (received from purchasing ImpactJS), server.py (obtained from here ), and index.html (also received from purchasing ImpactJS). Within tutorial/lib, place the impact and weltmeister folders. Lastly, you may obtain all of the media for this project here .
ImpactJS will look for two things when loading a game: a main.js file within lib/game and impact.js inside lib/impact. These are referenced within index.html, which is the file that gets served by our web server, server.py. These directories can be changed as needed, so long as the updated changes are reflected within index.html.
Running the game / Using Weltmeister
In order to run an ImpactJS game or access the tile editor, Weltmeister, you will need a web server to serve index.html. For this, we can run server.py which will provide us with two links: http://localhost:8080 for accessing the game, and http://localhost:8080/editor for accessing Weltmeister. The screenshot below shows the output of running server.py:
I suggest just letting the server run in a separate tab/terminal, as we will constantly be navigating to our game and level editor.
Weltmeister
This tutorial will reference the use of Weltmeister, ImpactJS’s built in Tile Editor program often. However, usage of Weltmeister will not be covered here, as there already exists a great video on using Weltmeister by ImpactJS’s own creator, Dominic Szablewski. See the references below for learning to use Weltmeister.
Weltmeister Video Weltmeister Documentation
Implementation
With all of our directories in place, we move onto building our main game file, main.js.
~/tutorial $ cd lib/game
~/tutorial/lib/game $ vim main.js
Within main.js, we require any modules needed in the game (all entities, levels and plugins), set up key bindings, camera settings, draw to the screen, and initialize our game instance. We begin by declaring our module and setting up our basic game instance.
ig.module(
    'game.main'
)
.requires(
    'impact.game',
    'impact.debug.debug',
    'game.levels.basic'
)

.defines(function(){
    MyGame = ig.Game.extend({
        init: function(){
            this.loadLevel(LevelBasic);
        }

    });
    // Create an instance of our game
    ig.main('#canvas', MyGame, 60, 320, 240, 2);
});
Here, we declare that main.js is a module through ig.module('game.main'). We then chain .requires to include the ImpactJS core game library,
impact.game. Next, we chain .defines to create a game class MyGame which extends from ImpactJS Game class. Notice that our game class extends from ig.Game, which means that we inherit all functionality contained within impact.game.js. This provides us with default implementations of init, update and draw, which we can override to develop our game.
Read ImpactJS Game Class Documentation
The init method is only run once in the game loop, making it a good place to bind keys to control our game load levels, and initialize any temporary variables needed for our game logic. After loading our level, we create an instance of our game through ig.main,
passing in the canvas element from our index.html page, our game class MyGame, frames per second (fps) 60, height: 320, width: 240, scaled up by a factor of 2. By running server.py and navigating to http://localhost:8080, you should see the level displayed.
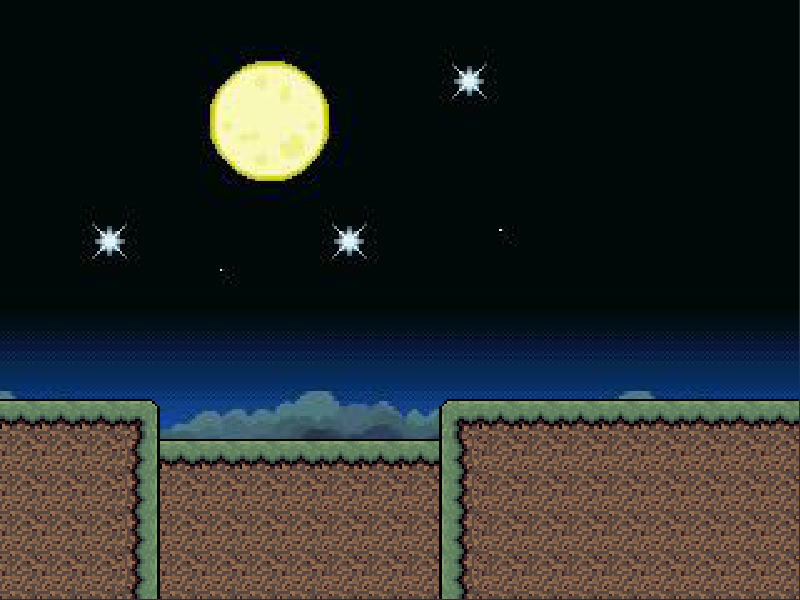
Having a plain level with no player is no fun, right? Let’s start implementing our player entity.
ig.module(
    'game.entities.player'
)
.requires(
    'impact.entity'
)
.defines(function(){
    EntityPlayer = ig.Entity.extend({
        animSheet: new ig.AnimationSheet('media/player.png', 16, 28),
        size: {x: 16, y: 28},
        flip: true,

        init: function(x, y, settings){
            this.parent(x, y, settings);
            this.addAnim('idle', 1, [1]);
        },

    });
});
Here we only create our player module, define an animation sheet and just a single animation (idle). To learn more about setting up animations, see the documentation below.
Read Animation Documentation Read Animation Sheet Documentation
Navigate to http://localhost:8080/editor and drop in our Player Entity, then navigate to the game page. We can see our player Entity!
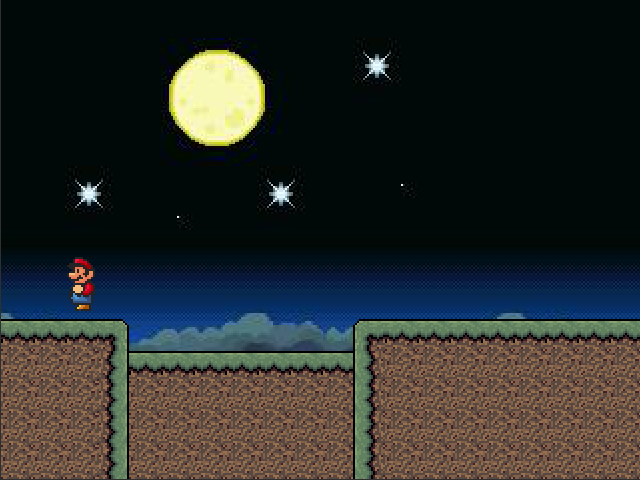
Our Player isn’t very interesting right now, as he only has one animation. Let’s go ahead and add in animations for running, jumping and falling:
    init: function(x, y, settings){
        [ ...previous code ...]
        this.addAnim('run', 0.10, [1, 0]);
        this.addAnim('jump', 1, [2]);
        this.addAnim('fall', 0.4, [2]);
    }
On its own, the above code does not change anything - we cannot interact with our player. We must bind keys to move our player, which we can easily do inside of our init function within main.js.
ig.module(
    'game.main'
)
.requires(
    'impact.game',
    'impact.debug.debug',
    'game.levels.basic'
)

.defines(function(){
    MyGame = ig.Game.extend({
        init: function(){
            // Define our key bindings here
            ig.input.bind(ig.KEY.LEFT_ARROW, 'left');
            ig.input.bind(ig.KEY.RIGHT_ARROW, 'right');
            ig.input.bind(ig.KEY.X, 'jump');
            this.loadLevel(LevelBasic);
        }

    });

    ig.main('#canvas', MyGame, 60, 320, 240, 2);
});
There are many different input keys available for use in our game. See the reference below to learn more about key bindings and the properties available for use.
If we navigate to the game, we see the same thing. We still cannot move our player, despite pressing our keys which bind to movement. The reason for this is that we must write our logic for moving the player when certain keys are pressed. How can we trigger events based on key presses and move our player accordingly? ImpactJS provides an update method for both entities and main.js which is where implement any logic our game requires. update gets called once per frame, meaning that if you configure your game to run 60fps, update will be called 60 times per minute. Below we handle the left/right movement case for our player.
ig.module(
    'game.entities.player'
)
.requires(
    'impact.entity'
)
.defines(function(){
    EntityPlayer = ig.Entity.extend({
        [ ... animation setup... ]

        // Add values for ground and air acceleration
        accelGround: 200,
        accelAir: 310,

        init: function(x, y, settings){
            [ ... ]
        },

        update: function(){
            // Add left/right movement logic
            var accel = this.standing ? this.accelGround : this.accelAir;
            if(ig.input.state('left')){
                this.accel.x = -accel;
                this.flip = false;
            } else if(ig.input.state('right')){
                this.accel.x = accel;
                this.flip = true;
            } else
                this.accel.x = 0;


            this.parent();

        },

    });
});
By observing the boolean value of this.standing, we determine our acceleration based on the values we defined for accelAir and accelGround. Based on the key pressed to move our player (ig.input.state('button')), we toggle our acceleration based on direction and adjust this.flip accordingly so that we face the right direction. One thing to note is this.parent(), which will appear many times over the course of this tutorial (and when developing games using ImpactJS). Let us take a moment to go over the functionality of this call.
As mentioned earlier, ImpactJS uses its own class inheritance system to have objects (game entities, game classes, etc) inherit from the core game classes. This means that by extending our EntityPlayer from ig.Entity.extend, our EntityPlayer automatically inherits defintions of any properties and methods defined within ig.Entity. This inheritance system should seem familiar to those with a background in C++ and Java (or any language that supports classical inheritance).
this.parent() calls the update method of the parent that it inherits from, meaning that we are calling ig.Entity update() method for our EntityPlayer (referenced by this). We know that ig.Entity provides default implementations of methods such as init, update and draw, so calling this.parent() will not actually override any behavior. However, we can use this.parent() to inherit from other Entities as well. Take the following code as an example.
ig.module('game.entities.player')
.requires('impact.entity')
.defines(function() {
    EntityPlayer = ig.Entity.extend({

        init: function(){
            this.attack: 10,
            this.defense: 5,
            this.magic: 3
        },

    });
});
The above code should seem familiar to us: we are simply defining a player entity called EntityPlayer, which extends from ig.Entity class. Now observe the next example:
ig.module('game.entities.gameplayer')
.requires('impact.entity',
          'game.entities.player'

.defines(function() {
    EntityGameplayer = EntityPlayer.extend({

        init: function(){

            this.parent();
        }
Notice how we are extending our EntityGameplayer from our EntityPlayer, meaning that we inherit all properties and methods defined within EntityPlayer. Calling this.parent() will call the same method from the superclass of the callee, in this case this.parent will call the init method within EntityPlayer, the superclass from which our Gameplayer extends from. By calling the superclass init() method, we can inherit any functionality that exists there. For the most part, this example will not be relevant within this tutorial, but this.parent is required to be called in methods such as update and draw in order for the game loop to correctly cycle.
Now that we’ve covered this.parent(), navigate to the game and try to move the player left and right. Success…?
Our player just slides around, left to right. He doesn’t animate to the left/right based on keypress. This is a simple fix, by simply adding this.currentAnim.flip.x = this.flip; to our update function.
ig.module(
    'game.entities.player'
)
.requires(
    'impact.entity'
)
.defines(function(){
    EntityPlayer = ig.Entity.extend({
        [ ... animation setup... ]
        init: function(x, y, settings){
            [ ... ]
        },

        update: function(){
            [ ... ]

            // Make our player animate left/right accordingly
            this.currentAnim.flip.x = this.flip;
            this.parent();

        },

    });
});
Our player will still slide around in midair, but he will properly animate and respond to left/right key movement. Speaking of sliding around in midair, we can fix this by adding attaching the gravity property to the game. Let’s go ahead and do that:
ig.module(
    'game.main'
)
.requires(
    'impact.game',
    'impact.debug.debug',
    'game.levels.basic'
)

.defines(function(){
    MyGame = ig.Game.extend({

        // Add gravity
        gravity: 300,
        init: function(){
            [ ... ]
        }

    });

    ig.main('#canvas', MyGame, 60, 320, 240, 2);
});
Since we added gravity to main.js, all entities in the game world will be affected by it.

After moving to the right, we notice we are stuck in the pit and cannot get out. Now is a good time to implement the jump ability.
ig.module(
    'game.entities.player'
)
.requires(
    'impact.entity'
)
.defines(function(){
    EntityPlayer = ig.Entity.extend({
        [ ... ]
        // How high the Player can jump
        jump: 360,


        init: function(x, y, settings){
            [ ... ]
        },

        update: function(){
            [ ... ]

            // Jumping logic: CASE 1
            if(this.standing && ig.input.state('jump')){
                if(this.vel.y == 0){
                    this.vel.y = -this.jump;
                    this.falling = false;
                }
            }

            this.currentAnim.flip.x = this.flip;
            this.parent();


        },

    });
});
If the jump button is pressed and the player is standing (has not jumped yet), we invert the Player’s y-velocity based on their jump factor. By making this value higher/lower, we can effectively control how high our Player can jump. What do we do when the player is falling though? We should also handle this case as well.
ig.module(
    'game.entities.player'
)
.requires(
    'impact.entity'
)
.defines(function(){
    EntityPlayer = ig.Entity.extend({
        animSheet: new ig.AnimationSheet('media/player.png', 16, 28),
        size: {x: 16, y: 28},
        flip: true,
        accelGround: 200,
        accelAir: 310,
        jump: 360,


        init: function(x, y, settings){
            [ ... ]
        },

        update: function(){
            [ ... ]

            // Jumping logic: CASE 2
            else if(!this.standing && !ig.input.state('jump') && !this.falling){
                this.vel.y = Math.floor(this.vel.y/3);
                this.falling = true;
            }

            this.currentAnim.flip.x = this.flip;

            this.parent();


        },

    });
});
Our player will not animate any different from before because we haven’t actually written any logic to determine which animation should be playing based on all key inputs. To handle this, observe the changes below:
ig.module(
    'game.entities.player'
)
.requires(
    'impact.entity'
)
.defines(function(){
    EntityPlayer = ig.Entity.extend({
        [ ... ]


        init: function(x, y, settings){
            [ ... ]
        },

        update: function(){
            [ ... ]

            this.currentAnim.flip.x = this.flip;

            this.parent();

            // Based on velocity and standing/falling,
            // display the right animation
            if(this.vel.y < 0 && !this.standing)
                this.currentAnim = this.anims.jump;
            else if(this.vel.y > 0 && !this.standing)
                this.currentAnim = this.anims.fall;
            else if(this.vel.x != 0)
                this.currentAnim = this.anims.run;
            else
                this.currentAnim = this.anims.idle;

        },

    });
});
Using the player velocity and .standing property, we can determine what animation should be displaying based on key press. Our player finally moves and animates correctly! He’s still sliding all over the place though, as if unaffected by friction. Luckily, we can easily fix this by using the friction property belonging to any Entity to control how our player is affected.
ig.module(
    'game.entities.player'
)
.requires(
    'impact.entity'
)
.defines(function(){
    EntityPlayer = ig.Entity.extend({
        [ ... ]
        // Apply friction and maxVel to make movement more fluid
        friction: {x: 500, y: 0},
        maxVel: {x: 100, y: 160},


        init: function(x, y, settings){
            [ ... ]
        },

        update: function(){
            [ ... ]
        },

    });
});
By capping the player maxVel value and applying friction, we now move properly without sliding all over the stage. With this last step, we have fully implemented our player entity. A game wouldn’t be challenging without having enemies, so how about we implement Mario’s mortal enemy, the goomba.
~/tutorial/lib/game/entities $ vim goomba.jsAs we did with our player, we begin by implementing goomba animation frames.
ig.module(
    'game.entities.goomba'
)
.requires(
    'impact.entity'
)

.defines(function(){
    EntityGoomba = ig.Entity.extend({
        animSheet: new ig.AnimationSheet('media/enemies/goomba.png', 25, 26),
        size: {x: 22, y: 19},
        flip: true,

        init: function(x, y, settings){
            this.parent(x, y, settings);
            this.addAnim('crawl', 0.20, [0, 1]);
        },
    });
});
If we go ahead to our level editor and drop in an enemy, then run our game we should see the following:

Our enemy animates properly, but does not move. As with our player, we need to implement its movement within the update method:
ig.module(
    'game.entities.goomba'
)
.requires(
    'impact.entity'
)

.defines(function(){
    EntityGoomba = ig.Entity.extend({
        animSheet: new ig.AnimationSheet('media/enemies/goomba.png', 25, 26),
        size: {x: 22, y: 19},
        flip: true,

        // Add speed
        speed: 50,

        init: function(x, y, settings){
            [ ... ]
        },

        update: function(){
            var xdir = this.flip ? -1:1;
            this.vel.x = this.speed * xdir;
            this.parent();
        },
    });
});
Here, we define speed which determines how quickly our entity will move. Within update, we determine the xdir movement of the entity based on flip. Depending on the value of this.flip, we invert the velocity of goomba. Below we can see the changes:
Our enemy now moves left, but gets stuck on the wall. We need a way to detect when an entity collides with a wall, and if so, make it start walking the opposite way. We can do this easily using the handleMovementTrace method, which detects when an entity collides with a collison tile within the collisionMap. The implementation of handleMovementTrace is shown below:
ig.module(
    'game.entities.goomba'
)
.requires(
    'impact.entity'
)

.defines(function(){
    EntityGoomba = ig.Entity.extend({
        animSheet: new ig.AnimationSheet('media/enemies/goomba.png', 25, 26),
        size: {x: 22, y: 19},
        flip: true,
        speed: 50,

        init: function(x, y, settings){
           [ ... ]
        },

        update: function(){
            [ ... ]
        },

        handleMovementTrace: function(res){
            this.parent(res);
            if(res.collision.x){
                console.log(this.flip);
                this.flip = !this.flip;
                this.anims.crawl.flip.x = !this.flip;
            }
        },
    });
});
When an entity collides with the collisionMap, handleMoevmentTrace is called and the entity in question is passed as a parameter. Through this, we can flip the entity if it collides on the x-axis. Due to the update logic, the entity will keep moving until it hits another collison tile, causing handleMovementTrace to trigger again and so on - making our entity able to move left/right indefinitely. To read more about handleMovementTrace, see the link below.
Read handleMovementTrace Documentation
Our goomba is almost done, but we cannot interact with it. We can overlap our enemy, but neither the player nor the enemy takes damage. In order to make entities in our game world interact, we must set up collision properties for both entities. ImpactJS provides a simple method for setting up collision between groups of entities. First, we will set up collision for our player:
ig.module(
    'game.entities.player'
)
.requires(
    'impact.entity'
)
.defines(function(){
    EntityPlayer = ig.Entity.extend({

        type: ig.Entity.TYPE.A,
        checkAgainst: ig.Entity.TYPE.NONE,
        collides: ig.Entity.COLLIDES.ACTIVE,

        [ ... ]


        init: function(x, y, settings){
            [ ... ]
        },

        update: function(){
            [ ... ]

        },

    });
});
Here, we set a type property which denotes the group our player belongs to. It is common to set all friendly entities to be TYPE.A, and all unfriendly entities to be TYPE.B. checkAgainst determines which entities in our game world our Player will interact with, and collides determines which entity will be moved upon collision. To read more about collison properties, refer to the documentation below.
Read Entity Type Documentation Read Entity checkAgainst Documentation
Similarly, we implement goomba with collision properties as well.
ig.module(
    'game.entities.goomba'
)
.requires(
    'impact.entity'
)

.defines(function(){
    EntityGoomba = ig.Entity.extend({

        // Setup collison
        type: ig.Entity.TYPE.B,
        checkAgainst: ig.Entity.TYPE.A,
        collides: ig.Entity.COLLIDES.PASSIVE,

        [ ... ]

        init: function(x, y, settings){
            [ ... ]
        },

        update: function(){
            [ ... ]
        },

        handleMovementTrace: function(res){
            [ ... ]
        },
    });
});
Here, we set the type to be of TYPE.B (enemy group). checkAgainst is set to check against entities of TYPE.A, namely our player Entity. Lastly, we set collides to passive, meaning that on collion, our goomba entity will not be the one pushed back. With this, our entities can now interact with each other. Go ahead and test out the changes!

Now that our entities can interact, we notice that nothing interesting happens on collision between our player and goomba. We’d like to make our player take damage on collision with an entity, so let’s go ahead and do that by implementing collideWith method:
ig.module(
    'game.entities.goomba'
)
.requires(
    'impact.entity'
)

.defines(function(){
    EntityGoomba = ig.Entity.extend({
        [ ... ]

        init: function(x, y, settings){
            [ ... ]
        },

        update: function(){
            [ ... ]
        },

        handleMovementTrace: function(res){
            [ ... ]
        },

        collideWith: function(other, axis){
            if(other instanceof EntityPlayer){
                other.receiveDamage(1, this);
            }
        },
    });
});
collideWith gets called on collision with an entity. When this method is called, the entity which collided with this one is passed in as the other parameter. We then check other to see if it is our player entity using instanceof. Notice how we reference our player: we use other instanceof EntityPlayer, where EntityPlayer is the name we gave to our Player Entity when we defined it. If this condition is true, we call other.receiveDamage, which is a method inherited by the Player Entity from impact.entity. By calling .receiveDamage, the player will take 1 damage each time it collides with our Goomba entity.
Read receiveDamage Documentation
If we test these changes, we notice that our player entity can now be killed by taking enough damage. We have not defined any methods to handle death, and we never defined health for our player, so how does this work? As mentioned before, any entity we create is extended from impact.entity, meaning that it inherits several properties and methods. It turns out that health: 10 is automatically defined by impact.entity, and our Player inherits this property. Whenever the health property of any entity is reduced to 0, the .kill() method is automatically called for the entity in question, removing it from the game world. Like health, .kill() is automatically defined for all entities.
It is currently hard to track how much health our player has, so next we will create a simple display for our health. ImpactJS provides a draw method which allows us to draw an image or text to the screen. In order to draw text, we will need to import a font. Downloading ImpactJS provides us with a default bitmap font, so we go ahead and load it within main.js:
ig.module(
    'game.main'
)
.requires(
    'impact.game',
    'impact.debug.debug',
    'game.levels.basic'
)

.defines(function(){
    MyGame = ig.Game.extend({

        // Load our font by providing a path
        font: new ig.Font('media/04b03.font.png'),
        gravity: 300,

        init: function(){
            [ ... ]
        },

    });

    ig.main('#canvas', MyGame, 60, 320, 240, 2);
});
With a font property defined, we can now use it within our draw method:
ig.module(
    'game.main'
)
.requires(
    'impact.game',
    'impact.debug.debug',
    'game.levels.basic'
)

.defines(function(){
    MyGame = ig.Game.extend({
        font: new ig.Font('media/04b03.font.png'),
        gravity: 300,

        init: function(){
            [ ... ]
        },

        draw: function(){
            this.parent();
            if(this.font){
                var player = ig.game.getEntitiesByType('EntityPlayer')[0];
                // Use our font to print: Health: player.health, X, Y, center_text
                this.font.draw('Health: ' + player.health, 50, 10, ig.Font.ALIGN.CENTER);
            }
        }

    });

    ig.main('#canvas', MyGame, 60, 320, 240, 2);
});
Within draw, we check if font exists. If it does, we get a reference to our player Entity by using ig.game.getEntitiesByType, which takes in an EntityName and returns an array of all Entities with the matching name. Here, we grab the first element of this array by using [0] - which refers to our player entity. With a reference to our player, we can now access its health property through player.healthand print it out to any position on the screen (X: 50, Y: 10), in this case. Go ahead and reload to see the changes.
We can now see our health, which adjusts as we take damage. Exciting stuff!
Things seem a little bit unfair now, as we cannot damage the enemy, but the enemy can damage us. As in traditional Mario games, we should be able to jump on top of enemies to defeat them. How can we accomplish this? If we recall our collidesWith method, it takes in two parameters: other and axis. We can check the axis which collision occured, and if it is vertical (y-axis), we know that we have jumped on the entity. Below is the impmementation of this:
ig.module(
    'game.entities.goomba'
)
.requires(
    'impact.entity'
)

.defines(function(){
    EntityGoomba = ig.Entity.extend({
        [ ... ]

        init: function(x, y, settings){
            [ ... ]
        },

        update: function(){
            [ ... ]
        },

        handleMovementTrace: function(res){
            [ ... ]
        },

        collideWith: function(other, axis){
            if(other instanceof EntityPlayer){
                if(axis === 'y'){
                    this.kill();
                }
                else
                    other.receiveDamage(1, this);
            }
        },
    });
});
With this simple change, we can now instantly kill the Goomba if we jump on it.

Before we wrap up this tutorial, how about we add a simple, classic Powerup? We will implement a mushroom powerup, although in this game we will have it increase our player health by 10 on collision. With all that we have covered before, this should be a straightforward task. The entire implementation for mushroom.js is shown below:
ig.module(
    'game.entities.mushroom'
)
.requires(
    'impact.entity'
)
.defines(function(){
    EntityMushroom = ig.Entity.extend({
        // Set up Collision properties
        collides: ig.Entity.COLLIDES.NONE,
        type: ig.Entity.TYPE.B,
        checkAgainst: ig.Entity.TYPE.A,

        // Set up Animation sheet and speed
        animSheet: new ig.AnimationSheet('media/mushroom.png', 16, 16),
        size: {x: 16, y: 16},
        speed: 100,

        // Set up animation frames
        init: function(x, y, settings){
            this.parent(x, y, settings);
            this.addAnim('idle', 1, [0]);
        },

        // Handle movement
        update: function(){
            var xdir = this.flip ? -1 : 1;
            this.vel.x = this.speed * xdir;
            this.parent();
        },

        // Handle collisions against collisionMap
        handleMovementTrace: function(res){
            this.parent(res);
            if(res.collision.x){
                this.flip = !this.flip;
                this.anims.idle.flip.x = this.flip;
            }
        },

        // If we collide with the player, restore health by 10
        check: function(other){
            other.receiveDamage(-10, this);
            this.kill();
        }


    });
});
All of this code should look very familar to the goomba entity we created earlier. The only difference here is within the check method: it calls the receiveDamage method on collision with the player (defined inside the checkAgainst property). Instead of doing positive damage to the player, we pass in a negative number to instead restore 10 health to the player. If we go into our editor and drop in a mushroom, we can test the changes and watch our health increase.

We’ve implemented everything we’ve set to do, but before wrapping up, let us briefly discuss the purpose of impact.debug.debug.
Debug Panel
When running the game with impact.debug.debug required inside main.js, you will see a debug panel on the bottom of your game instance.
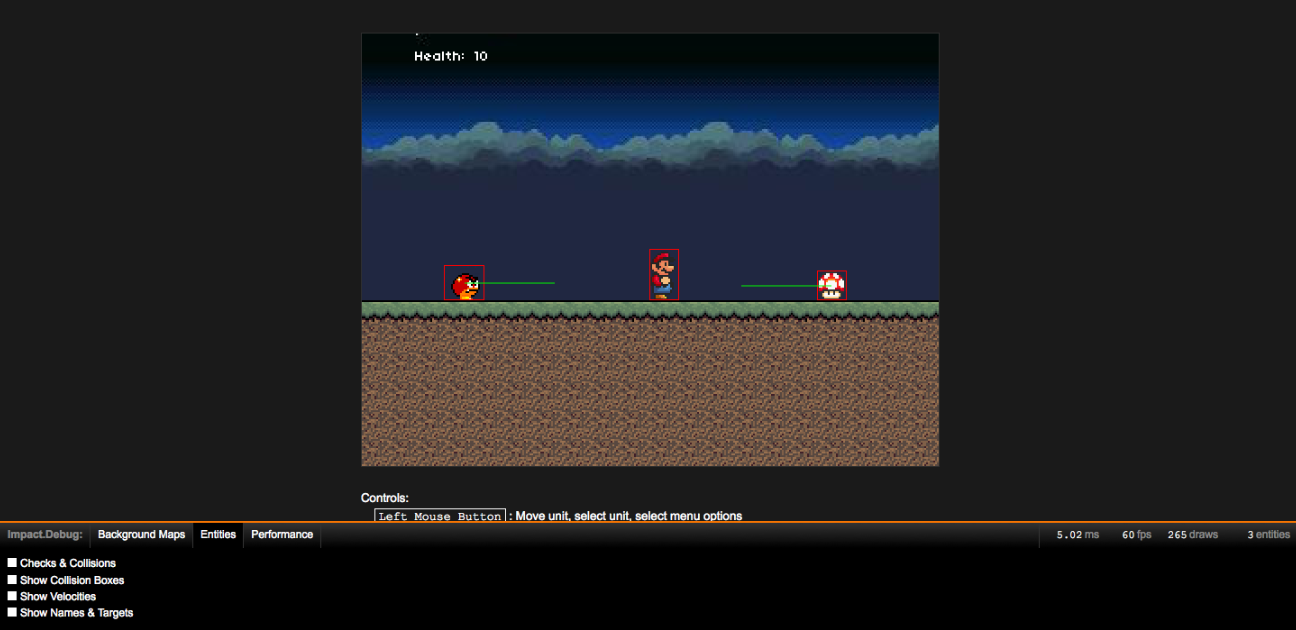
Here we can see that the debug panel gives us useful information, such as performance of our game, collision boxes around all entities, and velocity trajectories of all moving entities. We can also see how many draws are being performed on screen, as well as the number of entities in the game world. Alongside our browser developer tools and these analytics, we have a powerful set of tools for debugging our game.
Closing
If you’ve made it this far, congratulations! You now have a working example of a simple platforming game built with ImpactJS. This tutorial will be updated with more content as times goes on. The topics I would like to cover are:
- Using ImpactJS default camera
- More powerups, such a projectile attacks
- Implementations of different types of enemies
- Creating different game states for Title Screens and Game Over screens
Stay tuned, and thanks for reading.